QGIS Desktop
QGIS is a professional GIS application that is built on top of and proud to be itself Free and Open Source Software (FOSS). QGIS is a volunteer driven project if you are interested you can find more information at https://www.qgis.org.
QGIS Desktop Main Window
How can I connect to Geonode?
Open QGIS Desktop and go to Layer Menu > Data Source Manager. At the bottom of Data Source Manager, you can see a tab with the name and an icon related to Geonode. This is because Geonode is recognized as a data source inside QGIS.
Data Source Manager Dialog
Note
It’s possible as well load Geonode instances from an existence file this is useful to share between users or to backup existence connections.
To add a new Geonode instance, in the Geonode tab selected click on New and you will see the following dialog:
Details of Geonode instance Dialog
In the dialog Fill the name as you like and in the URL put the link of the Geonode instance. It’s possible edit some WFS and WMS options to optimize the connection. If everything is ok you will receive the following successful connection dialog:
Successful connection Dialog
After the successful dialog it’s now possible to load all layers of the Geonode instance clicking on Connect button. You can see both WMS and WFS connections of the Geonode and you can load to QGIS Desktop.
Geonode instance layers Dialog
After select a layer (WMS or WFS) click on the Add button and the layer will be displayed in the main window of QGIS.
Example of Geonode layer
Warning
This procedure only work with public layers. If the layers are for private use is necessary to do the standard qgis add remote WMS/WFS layers (through Data Source Manager) along with basic auth method and specific endpoints.
Connect to Private layers by using OAuth2
GeoNode OAuth2 Client App Setup
Login to GeoNode as a superuser
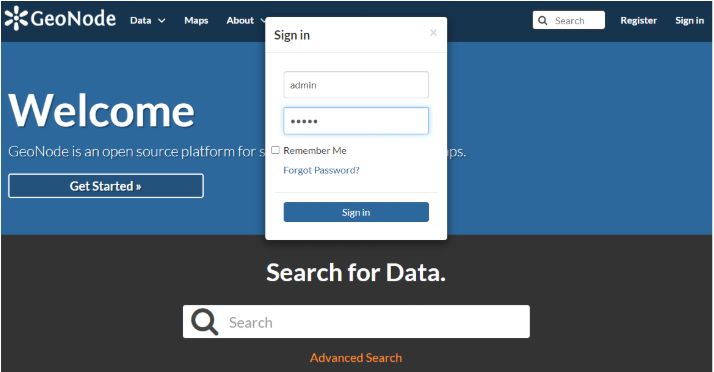
Browse to http://<geonode>/o/applications/

Create a new specific app or, better, edit the existing one (“GeoServer”) based on OAuth2 Authorization Code Grant Type
Click on “Edit” and add the Redirect URI http://127.0.0.1:7070/qgis-client as shown below
Note
This is an example. The port and path of the URI can be customized. They must be the same on both GeoNode and QGis Client as shown later.
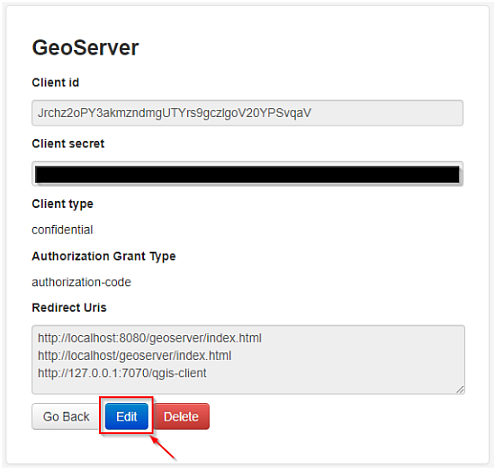
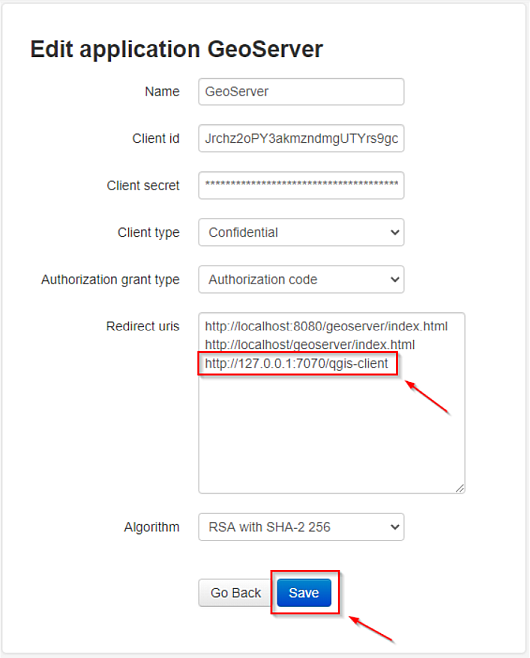
Also you will need the Client ID and Client Secret keys later when configuring QGis.
Configure QGis Desktop Client OAuth2 Authentication
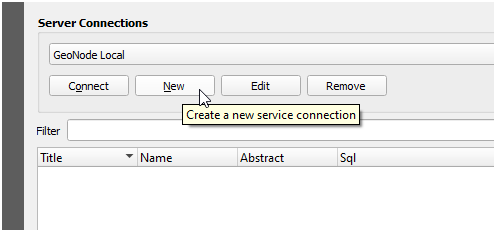
Open the QGis Desktop Client and add a new OWS remote Layer configuration
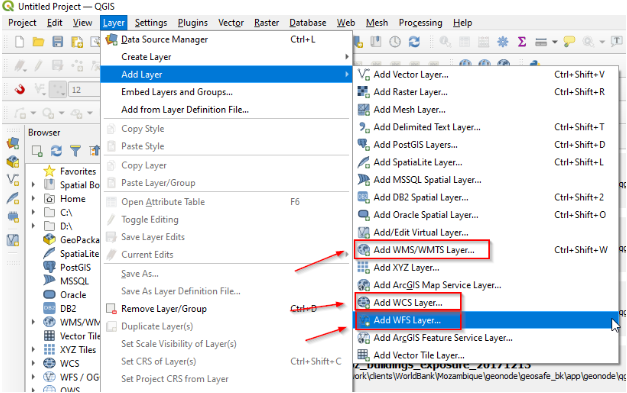
Create a new service connection
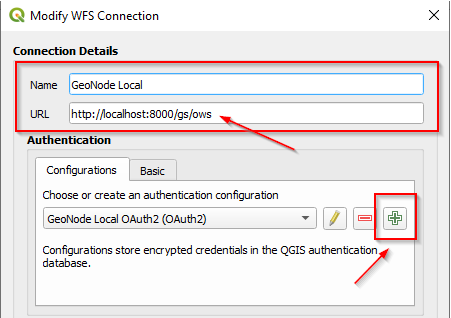
Provide the connection details
Note
It is Important that the URL ends with /gs/ows
When finished click on “+” in order to add a new auth configuration
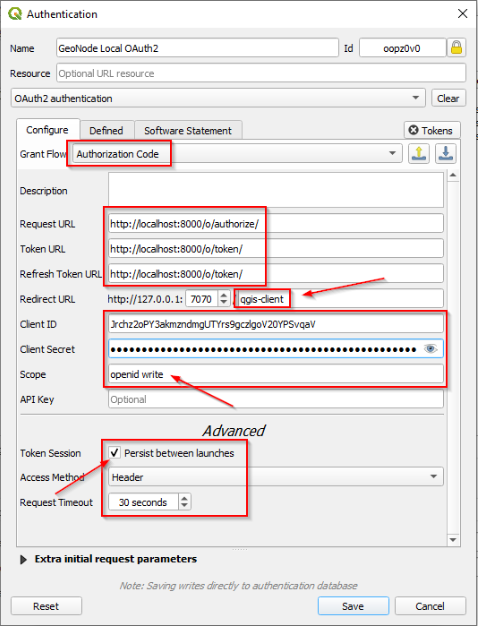
Provide the needed information as shown below:
Name: any descriptive string
Type: OAuth2 authentication
Grant Flow: Authorization Code
Request URL: must end with /o/authorize/
Token URL and Refresh URL: must end with /o/token/
Redirect URL: must match with the one defined on GeoNode above
Client ID and Client Secret: must match with the one defined on GeoNode above
Scopes: openid write
Enable the persistent Token Session via Headers
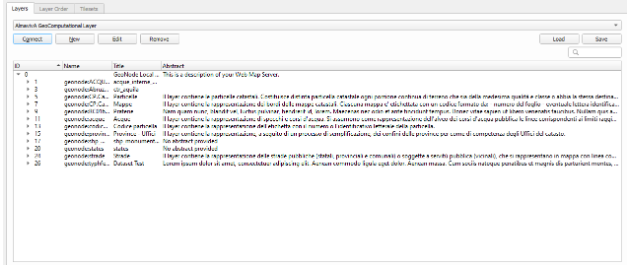
Save and click on “Connect”. QGis will redirect you on a browser page asking to GeoNode to authenticate. Approve the Claims and go back to QGis.
Remove Saved Token Sessions From QGis and Login with another User
Edit the QGis configuration
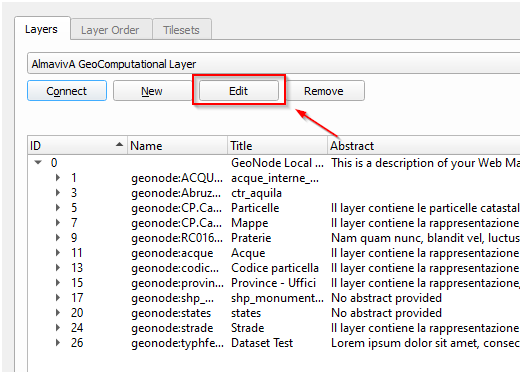
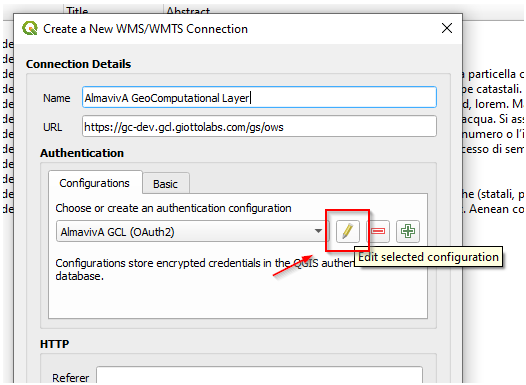
Click on the “pencil”
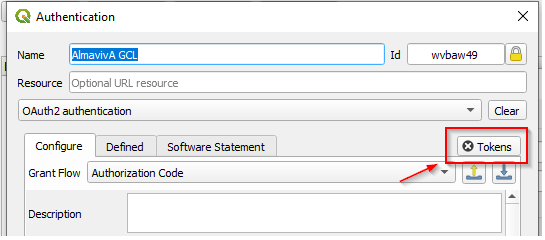
Clean up the saved Tokens and save
Try to connect again.